

 For operators, liquid leakage is a distressing thing, because some leakage problems are relatively intuitive and easy to solve, but some leakage problems are more complex and need to be investigated in depth. Today, uHPLCs will talk to you about how to solve liquid chromatography leaks.
In liquid chromatography from the beginning of the mobile phase bottle to the end of the waste bottle, its circulation pipeline is fully closed, although the internal pressure is very high, the outside of the chromatograph will not appear as a drop of liquid. If a liquid leak occurs, the system will generally signal an error and will not work properly.
Generally, we say that liquid chromatography leakage is mainly the following parts of the leakage: joint leakage, injection valve leakage, pump leakage, detector leakage, and column leakage five parts, the following I have a brief introduction to each part of the leakage.
1, Joint leakage generally occurs in the column joints, where the leakage phenomenon is more intuitive, generally liquid accumulation in the column head, resulting in pressure fluctuations. Usually can be tightened or replaced the pipeline joints to solve the problem of leakage. However, it is important to note that over-tightening can lead to leakage from metal joints and wear of plastic joints.
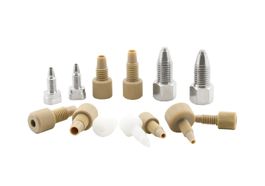
If the leak is not resolved by slightly tightening the fitting, the fitting must be removed and inspected for damage (e.g. damaged ferrules, contamination on the sealing surface); damaged fittings should be replaced.
Refer to the following table:
|
1. Loose joints |
1. Tightening |
|
2. Worn joints |
2. Replace |
|
3. Joint too tight |
3. a. Loosen and retighten b. Replace |
|
4. Contaminated joints |
4. a. Remove and clean b. Replace |
|
5. Mismatch of parts |
5. Use the same brand of parts |
2, Inlet valve leakage
(1) The rotor seal is too worn or damaged, resulting in a poor seal. Remove the six-way valve, and check the rotor seal, which can be purchased separately, according to the instructions to install their replacement. If the stator is badly worn, it may also be necessary to replace it.
(2) The waste pipe is siphoned or blocked, causing a backflow of waste liquid. In this case, you need to keep the waste liquid tube above the waste liquid level or replace or unclog the waste liquid tube to ensure normal waste liquid discharge.
(3) The inlet seal is loose, or the inlet needle is not the right size. The inlet seal needs to be adjusted, or the inlet needle needs to be replaced with a suitable one.
Specific methods:
|
Causes |
Solutions |
|
1. Damaged rotor seal |
1. Reinstall or replace the inlet valve |
|
2. Quantified ring blockage |
2. Replacement of the dosing ring |
|
3. Loose sample inlet seal |
3. Adjustments |
|
4. Improperly sized injection needle |
4. Use the right injection needle |
|
5. Siphoning in the waste line |
5. Keep the waste pipe above the waste level |
|
6. Blocked waste pipe |
6. Replacement or unblocking of waste pipes |
3, pump leakage pump head leakage is generally caused by poor sealing. You need to check the sealing condition of the relevant interface.
(1) One-way valve, loose joints, this is the first item to be investigated, but the check valve and joint can not be screwed too tightly to avoid wear and tear.
(2) plunger rod wear scratch or plunger gasket damage caused by the plunger after liquid leakage; this is the most common problem. This situation will generally appear in the following three phenomena: the plunger rod wear resulting in a small gap between the seal; the plunger rod and the seal does not match; the pump head fastening screws are not tightened. The plunger rod or plunger gasket must be replaced when determining the tightening. Thirdly, the proportional valve is damaged. First, check the hand-tightening joint. If there is damage, then immediately replace; check the diaphragm; if found to be leaking, immediately replace.
Specific methods:
|
Causes |
Solutions |
|
1. One-way valve lose |
1. a. Tighten the check valve without tightening it too much b. Replace the check valve |
|
2. Loose joints |
2. Tighten the joint without over-tightening |
|
3. Damaged mixer seal |
3. a. Replace mixer seal b. Replace mixer |
|
4. Damaged pump seal |
4. Repair or replacement of pump seals |
|
5. Damaged pressure sensor |
5. Repair or replacement of pressure sensors |
|
6. Damaged pulse dampers |
6. Replacement of pulse dampers |
|
7. Damage to proportional valves |
7. a. Check the diaphragm, and replace it immediately if it is leaking b. Check the hand tightening joint, and replace it immediately if damaged |
|
8. Damage to the venting valve |
8. a. Tighten the bleeder valve b. Replace the bleeder valve |
4, Detector leakage
(1) Circulation cell gasket damage, resulting in leakage. Avoid excessive pressure during use, disassemble the circulation cell, check the gasket, and replace the gasket if the damage is serious.
(2) Waste liquid tube rupture. Under the manufacturing of external force, the waste liquid tube is squeezed, causing rupture; open the detection cell and check the pipeline; if ruptured, it needs to be replaced.
(3) Blockage of the flow cell. When the circulation cell is blocked, its internal pressure rises, which may cause the cell window to rupture. In this case, the circulation cell needs to be cleaned, and if necessary, the circulation cell or the cell window needs to be replaced.
Specific methods:
|
Causes |
Solutions |
|
1. Damaged flow cell gasket |
1. a. Avoid excessive background pressure (pressure drop) b. Replace gaskets |
|
2. Broken flow-through pool window |
2. Replacement window |
|
3. Leaking hand-tight fittings |
3. Tighten or replace |
|
4. Clogged waste pipe |
4. Replacement of the waste pipe |
|
5. Clogged circulation basin |
5. Reinstallation or replacement |
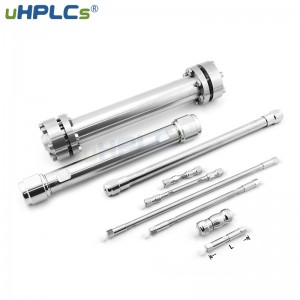
5, HPLC Column leakage
|
Causes |
Solutions |
|
1. Loose coupling on column tail section |
1. Tighten the joint |
|
2. Ferrules with packing inside |
2. Remove, clean and reinstall ferrules |
|
3. Unsuitable frits thickness |
3. Use of suitable frits |

Post time: Feb-11-2023


